Thursday, April 25, 2013

Sweet Dreams Chrissy


Chrissy in her signature 'school girl uniform' performing live.

Apri 21, 2013 Australia lost a music icon .. the divine forever rock chick, Chrissy Amplett, lead vocalist of the Divinyls, dead at 53. 
 
She died in New York, surrounded by people she loved which is what any of us could ever hope for when we depart the mortal coil.
 
Chrissy suffered for some years with both MS and breast cancer, but it was the breast cancer that claimed her life.

 The Divinyls performing Pleasure & Pain 1983

The Divinyls were a band that for me defined Australian music and living in the 80's.  The 80's is known for many things including bad fashion and big hair, but for me it was simply a time that I was young, carefree and wild. 
 
Chrissy was the epitome of wild woman, her rock chick moves, lushious pouty lips, smokey eye make up and raunchy stage costumes.
 
Combine this with a unique husky singing voice, she was simply amazing to see live.
 
I saw the Divinyls perform in Perth, Western Australia in the early 80's .. back then I think I paid about $20 to get into the gig. 

Then again in 1988 at the Expo in Brisbane.
 
I am grateful for the experience. Thank you for the memories 'The Divinyls'
 
 
I mourn the loss of Chrissy very much. 
 
Vale Chrissy, sweet dreams, Australia adores you.

Friday, February 1, 2013

P to the Power of 7

P to the Power of 7 .. What's that you say?  It is a term born on a mining site during the very difficult commissioning phase of the Murrin Murrin Cobalt and Nickel mine, Western Australia.  A place that had epic problems due to design faults, which eventually resulted in legal action.
 
Prior, Planning & Preparation Prevent a Piss Poor Performance ... is the long version of P7.
 
Crude in some respects, but remember this term was created on an isolated mine site which was a male dominated work place.
 
I designed the 'Painted Daisy' ring prior to Christmas 2012, made four samples and was very pleased with the design and excited to share it with Digital Beading magazine readers. 

It was the Christmas school holidays, I was stressed it was hot, my boys were being their usual badly behaved, shouting, ever hungry, bored selves.  The deadline for the delivery of my project was the end of January 2013. It was very hard to think, let alone have time to work uninterupted on the PC with both of my boys at home.
 
I thought to myself, this design is nice and quick (I can bead one up in just over an hour) so it will be no trouble to write up.  I will leave it untill the last week of the school holidays before I begin the tutorial/pattern .. confidently I thought ..it will be ok.
 
Whilst I felt I had addressed and throught about the P7 I did not factor in any 'what if's' .. ie variables that are not within my control.
 
So .. what if..?
 
My boys return to school, and I start writing the tutorial with only days till the deadline, then discover that it is impossible to articulate parts of the design into a written and diagrammatical format.
 
What if I had to re-design the 'Painted Daisy' ring so that I could in fact articulate the design into a written and diagrammatical format.
 
What if I started writing up the tutorial, took a break and decided to clean up some software installations that I perceived to be not useful.
 
What if I deleted several programs only to discover that I had deleted the files that control the resolution for my oversised monitor, so that when viewing documents they were stretched across the monitor and impossible to work on..
 
What if it took all day to reinstall all the software that I deleted before I was able to use the PC again.
 
What if I took all the photographs of the steps to make the design, downloaded them, edited them, named them, inserted them into the document only to discover that I had created the sample with 12 units in the bezel rather than 13 units.
 
What if I had to make the sample again, and wait for the camera batteries to charge, photograph all the steps a second time, download the 2nd set of photographs, edit the new photograpahs and name the new photographs.
 
What if I was about to start the tutorial again with the new images and then got a phonecall from the school, saying my son was ill and needed to be taken home.
 
What if I started writing that project again stayed up really late two nights in a row, the second night until after midnight only to be woken up at 2am to clean up vomit, then woken up again 2 hours later with that same sick child that came home early from school that day. 
 
So a timely note to self is, when you have the time well in advance to prepare something that has a deadline, use that time.  You can use the P7 all you want but there will always be What If's.
 
Happy Beading..Mel
 

Thursday, January 17, 2013

Hepzibahs Pendulum Neckpiece gets published!

Hepzibahs Pendulum .. you say?  What's that you say?  Hepzibah was the name given to my maternal great, grandmother we just called her Dais or Daisy Belle.  She lived until she was 92.
 
I named this piece in honour of her.
 
My beading bud (bbbf), who lives in Sydney, Patrick Duggan was invited by Marcia DeCoster to submit designs for a new book Beads in Motion.  I was very excited for Patrick and this opportunity, it got me thinking tho ... hmmm could I design something that actually moved using only beads.  I quickly slipped into Melly World (an annoying state of mind for those who know me, particularly my husband, children and mother).. it is a state of mind that I can 'shut my ears off' and tap into my creative muse.  I sketched out only one design.  Patrick, in the meantime had contacted Marcia to enquire as to whether I might submit work for consideration.  Marcia was delighted with the suggestion so I set to work.
 
My design journal
The concept that I had in mind was a swinging pendulum as an actual neckpiece. I had an amazing faceted 34c Amethyst bead in my stash that I wanted to use as the actual pendulum weight, so the colour way was determined by the use of that single bead (joining Amethyst would be reds and golds). 
 
How to make it swing?  First I bezzeled a divine Swarovski Dentelle in the colour 'Light Siam'.  Size 60ss this sweet baby is vintage and discontinued, consequently a rare beauty.
 
From the Dentelle grew the barrel that the pendulum would swing from.  Next a beaded ring from which to suspend the pendulum. So that the pendulum did not slip around I had to design a chanel for the pendulum to sit within.  The beaded ring, barrel and chanel still had to allow for 'ease of swing' so significant fine tuning of the design was required at this time.  Now how to make it a vision of beauty ie a neckpiece worthy of the Gallery section of the esteemed Master Beader, Marcia DeCoster.  Not daunted I let the design 'rest' whilst my muse delivered the design .. I did not have to wait long.
 
The pendulum and side view of the barrel
The pendulum has to be at the base of the focal, where all good pendulum's are.  I designed a top half of the pendulum using another 60ss Dentelle, this time more heavily embellished and larger to aid in the balance of the focal. 
 
An initial join of the focals, but was abandoned.
The two focals joined using the rope feature


Then the next design hurdle presented itself ..how to join the two components?  I decided upon creating another barrel for the top Dentelle focal, then joining the two with a strap of herringbone.  Joining the top focal and the pendulum focal required the most design time.  Why?  Balance had to be considered, the pendulum had to swing unobstructed and it had to look beautiful.  Days of bead engineering, sampling, undoing, redoing, frustration and a couple of times total dispair as I could not achieve harmony between the focals. 
 
But patiance and engineering prevailed and the two focals were successfully joined and achieved all the target specifications ie to swing and to be functional.  I changed out the length of the pendulum to a shorter version, then created a bead cap to add further weight to add in functionality of the 'swing' factor of the pendulum.
 
Close up of the 34carat Amethyst drop
Next part of the project was to hang the pendulum focals.  I decided on twin strands of Swrarovski pearls and the addition of another two 60ss Dentelles. 

Connector lengthens the neckpiece
Connector removed shortens the neckpiece


Then the clasp.  I am a fan of magnetic clasps, I source the finest and the strongest from around the world.  The magnetic clasps used in this design are gold filled and small. 
 
An addition of a single beadwoven ring of beads sits between the clasp focals which are two, 60ss Dentelles. This acts as a neckpiece connector, ie remove it and the neckpiece is shorter by an inch or so.  Hepzibah's Pendulum required 2 full weeks of beading and designing.
 
An email from Dawn Dillingham arrived this morning from Lark Publishing.  The email confirmed that Hepzibah's Pendulum was selected and will be included in the Gallery of Marcia DeCoster's second book 'Beads in Motion'.  I am so thrilled and I am so delighted.  I am uncertain of the scheduled release date of the book, but it will be 2013.
 
Late last year, 2012 I submitted Hepzibah's Pendulum to the Fire Mountain Beads & Gems, Seed Bead Category contest, which is run annually.  I received confirmation that Hepzibah's Pendulum had been selected for second round judging, she is currently in the USA.  I look forward to hearing how she went.  I will let you know as soon as I do.
 
Patrick informed me today on reading my blog, that he too has had work accepted to appear in the book.  How fabulous to share the pages with my delightful and talented friend. 

Thank you to Patrick Duggan and Marcia DeCoster for this amazing opportunity to share my work with the world.  I am deeply grateful.
 
Happy Beading
Mel
.... currently heading off into Melly World to absorb inspiration for Bead Dreams 2013.
ps you may note that a photograph of the completed 'Hepzibah's Pendulum' is not included in this blog post .. once the book is published I will share a pic.


ps news to hand (April 2013) Hepzibah's Pendulum won the 2012 Bronze Medal, Seed Bead Category in the Fire Mountain Gems & Beads, jewelry contest which is run annually.


Tuesday, January 15, 2013

Achieving Soutache Symmetry


Venetian Tango
Venetian Tango - Focal
Whilst wondering around Etsy.com in search of Soutache excellence to pin to my Board  'Soutache Extrodinaire' (yes I am Pinterest crazy right now).  I happened across a store that was selling a Soutache neckpiece for $175.  I looked closely argh .. cheap soutache, wonky stacking* and gasp .. symmetrical imperfection!  Now before I say anymore, lets just clear up that I do not claim to be the Queen of Soutache Embroidery, merely the Duchess of Symmetry (tongue in cheek of course).

Currently I am working on a Soutache piece entitled 'Venetian Tango' it's a vibrant piece using glass cabochons and beads from my vintage Venetian Millefiori collection,  The 'Tango' reference is ode to the vibrant red and black Soutache and sparkling movement the piece exudes.  I decided to share how I created two components for this to demonstrate how to achieve symmetry.

To achieve symmetrical perfection typically does not happen the first time you play with Soutache, indeed not the second or third time either.  Symmetrical perfection requires focus, steady hands, a good eye, technique and the final ingredient .. 'patience'. 
 
Creating Art is not a production line activity, so there is never a need to rush to finish, not ever.

Creating Symmetrical Perfection

Start by placing the components you want and lay them out in readyness.  I have two components here that require symmetrical perfection.


For these componets I precut  identical lengths of Soutache. I only use premium quality European Soutache. Soutache from 'Spotlight and/or Lincraft' is suitable for practice sampling only. 

I work from one component to the next, ie in tandem this way I am replicating identical components.

To ensure perfect symmetrical proportions of my fold back curls (we'll just call them curls for now).  I select the first component, ensure that my working thread (always use Fireline, typically I use 2lb or 4lb for sewing the Soutache) is exiting the edge of the back of the component (see pic below the 'white' line). 
 
See where the white line (Fireline) exits
Carefully fold back your Soutache stack of strands to form the curl, position them, ensuring the curl Soutache strands are carefully stacked.  Examine the curl, is it perfect?  If so, position the curl to the back of the cab by sewing through the ends of the Soutache and anchor it.  (At this point in time I like to sew through the curl stack to join the layers of Soutache).  Move to the second curl on the first cabochon.  Look at the first curl, then start creating the second curl.  Hold the ends with your fingers, now look at the curl .. ask yourself is it identical to the first curl? .. if not, redo it, keep redoing it until it is identical, then anchor it using your working thread.  Even after you have anchored the second curl, look at it again, from different angles, is it identical?  If not unpick and start again, as so often is said in Australia 'she'll be right mate' just will not do in this instance.

The first completed Compoent with Symmetrical Curls
The second component, this is where it starts to get a wee bit tricky as this one must be identical to the first component.  I understand that Soutache embroidery allows for 'organic movement' but typically the components must have symmetrical proportions.


Creating the Second Component


Once both components are completed, pick them up, look at them again 'Are they truly symmetrical?'
 
Remember your work is an extension of you, it reflects your design talent, craftsmanship, work ethics and your attention to detail.  Which in turn will reflect in your sales and return customers who will wait eagerly for your new designs. 


Symmetrical Components
Anneta Valious is releasing her new book, Soutache 30 Designs this June through Lark Publishing. My work appears in the Gallery of this book. 
 
If Soutache interests you this book is ideal for your library.  Keep out a watch for it on Amazon.com in the book section, typically new books from Lark Publishing are available for pre-order which saves you money from the cover price.  I will include the link to Amazon.com when the book is listed with them.
 
*Stacking refers to the layers of Soutache braid that 'lie' together.


Tuesday, September 25, 2012

Soutache Embroidery - Covering the back!


Whilst working with Soutache (my second love behind beadwork) I discovered a neat way of finishing the back area of your Soutache piece's. I like the back to look tidy and professional. I've called it the MI Method!
Step 1
Remove as much excess Soutache tails as possible, the less bulk the better.  Pin on a piece of tracing paper or baking paper, over the area to be concealed, ensure you press down and capture the folds of the Soutache.  Using a marker, draw the out the area to be concealed. See Step 1. 
 
Note: The surface area is increased by the folds of the Soutache tail bulk, this must be factored in when preparing the template.

Step 2
Remove the pins and cut the template out, not to the marker line, just roughly around the template. See Step 2.  
 

Step 3
Pin the template to your section of UltraSuede or Leather (or whatever it is that you prefer to work with).  I have pinned my template to UltraSuede (see Step 3).  Cut out the template.  Lay it carefully onto the area to be concealed.  I like to find a particular area on the Soutache piece to lay the UltraSuede onto first.  In this sample I have started at the top (see Step 4). 
 
Step 4
I use Loctite glue for my Soutache work as it adhere's immediately. Ensure that you glue and press the UltraSuede into the folds of the Soutache tails (this part is important!).

Step 5
Using a pair of small sharp scissors, carefully snip the excess away from the Soutache perimeters of the area to be concealed (see Step 5).  Do this slowly and carefully, adding dots of Loctite to the area to be glued, pressing down to ensure adhereance, then moving onto the next area.

Step 6
Using the MI Method I have been able to proudly finish the back area of my Soutache pieces to a professional standard (see Step 6). 

Wednesday, August 15, 2012

Battle of the Beadsmith Round 3 - The Creation of Arabesque Armour

An original pencil design from my design journal of how I envisaged my then unamed Battle of the Beadsmith entry.
How was I inspired to create Arabesque Armour? This question was asked of me and in all honesty I do not really know. I do not always understand this about any of the artisan jewellery pieces that I create. Sometimes I get just an image in my mind, then process this sometimes for weeks. Visualising thread paths and possiblitilies. I will make samples using Nymo (rather than expensive Fireline) to get a feel for what my mind sees. I can be inspired by many things cloud shapes, my very large bead stash, how food and colours are displayed on a plate, vintage couture jewellery, even words can inspire me such as my latest piece "Anna's Snowrose". "Anna's Snowrose" was inspired by my Facebook friend Anna Lindell whom I met as she too is a participant of the Battle of the Beadsmith contest. Anna commented one day that my design Arabesque Armour resemebled a "rose on a stem". Later I met Snowrose Feldman another Facebook friend and with that my muse got me busy creating Anna's Snowrose (I will blog about this design another day).

A second original pencil design from my design journal, still playing with concepts.
Where did the floral focal inspiration arrive from for Arabesque Armour I will never know. Perhaps it was when I sit and create samples and play with stitches, my drawings or it could have been when I saw a magazine cover earlier this year that had a floral shaped cuff bangle.  I looked at that cuff design and thought ..'I can bead that' .. with that I snapped a pic with my iPhone, then promptly forgot about it.  Why did I even choose a floral focal?.. again, I do not exactly know. 
Pic snapped with my iPhone
I fiddled with samples for the floral focal for some time and finally went with Cubic Right Angle Weave as the stitch to bring my floral idea to life.  As only a beader will know, you may have an idea of a design in your creative mind, but actually creating it using only beads can sometimes just not be possible as ultimately the beads are boss. Design limitations and time resulted in the floral focal that became central to my Arabesque Armour design.  I knew that because it was CRAW I could embellish it and create something wonderful. The next part of the design process was how best to display the floral focal.  I decided on a beadwork frame setting that would be embellished with Swarovski elements and seed beads.

Because this piece was being designed for the Battle of the Beadsmith contest I wanted to produce my best work as the audience would be large, very large.  I wanted to include something new and different. I included CRAW attachment points on my Rivolis within the beadwork frame so that I could join them seamlessly.  I wanted wonderful curls that I could embellish and most of all I wanted to produce something totally original.  I chose a colour way that I had not ventured into before. I wanted it to say nothing more than 'fun' and colour especially pinks, lemon, purples and yellows suggest fun (to me anyway).  The Battle is about friendship and uniting artists around the world so I wanted my colour way choice to reflected just that.
For a bit of Battle fun I decided that the tassel must be detachable for Battle purposes; my thoughts being detach prior to Battle so that a flaying tassel does not interfere with sword weilding, all tongue in cheek though.
Arabesque Armour is continuing on into Round 3, this time I am paired with USA Artist Christian Rodriguez and her wonderful design "Antigua".

Here I am deciding if the floral focal should sit above or below the CRAW beadwork.
 
This is the beginning of the curls that eventually sat either side of the beadwork frame. The curls sort of happened by accident whilst I was deciding how to hang the focal.

This is me wearing my completed design, Arabesque Armour


Sunday, July 22, 2012

Gold Medal Winner - Presidents Award

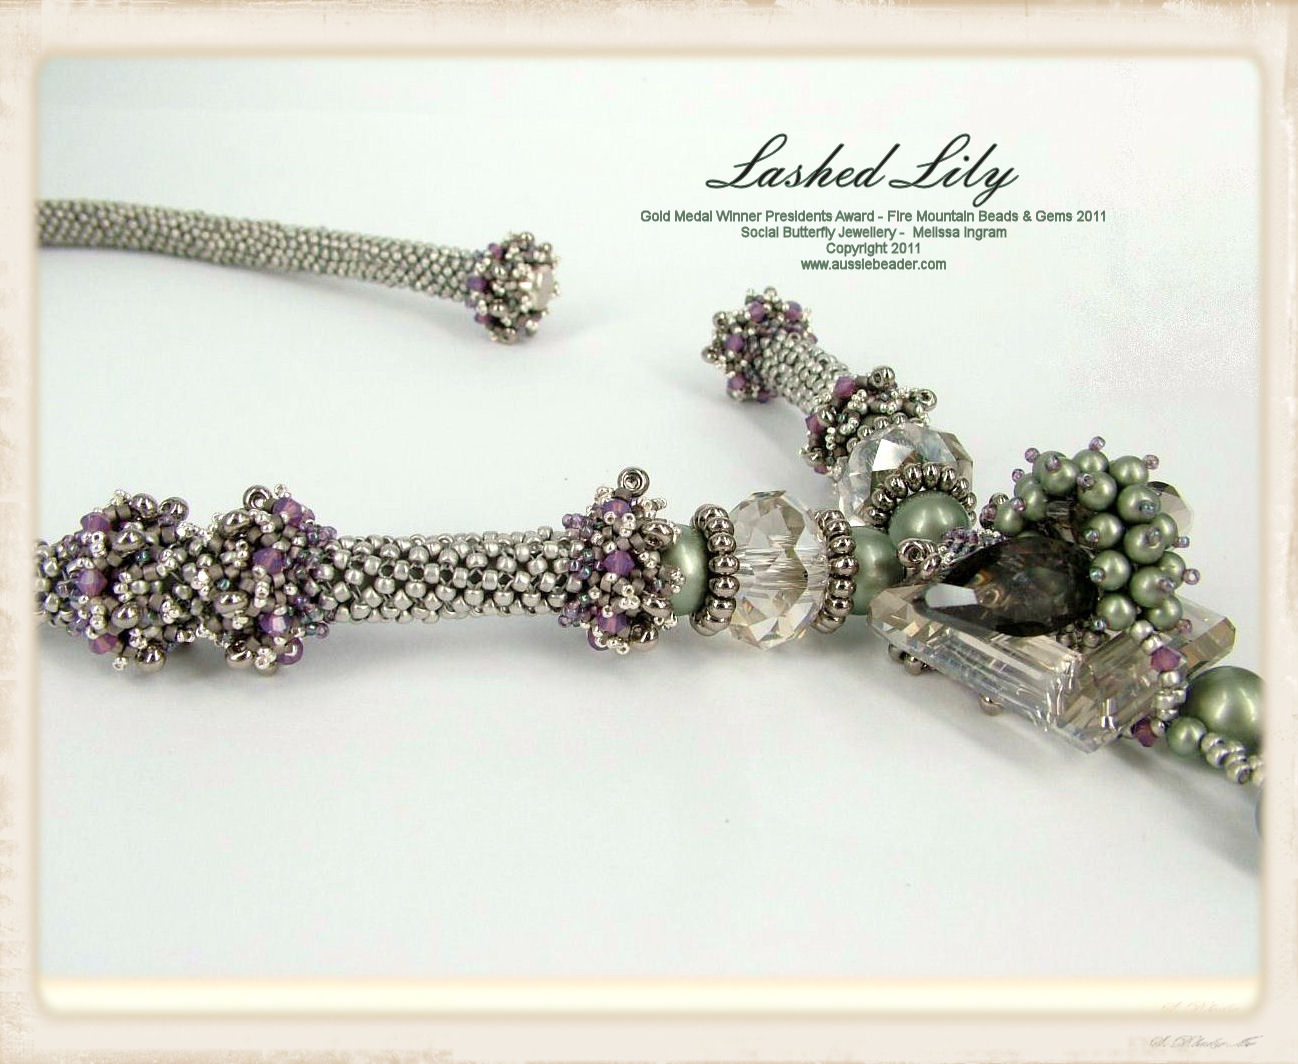
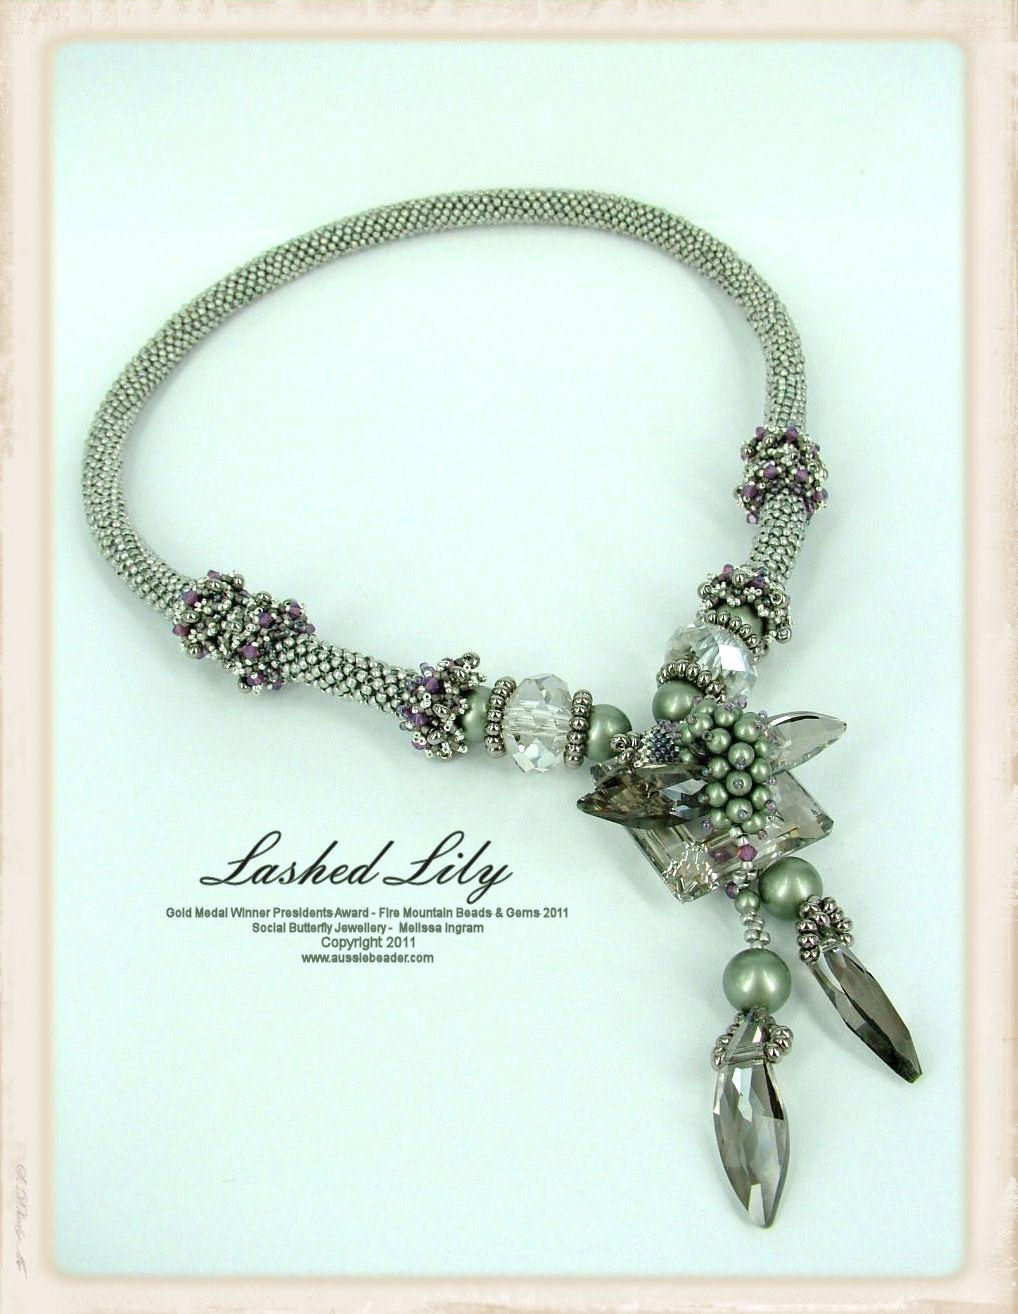
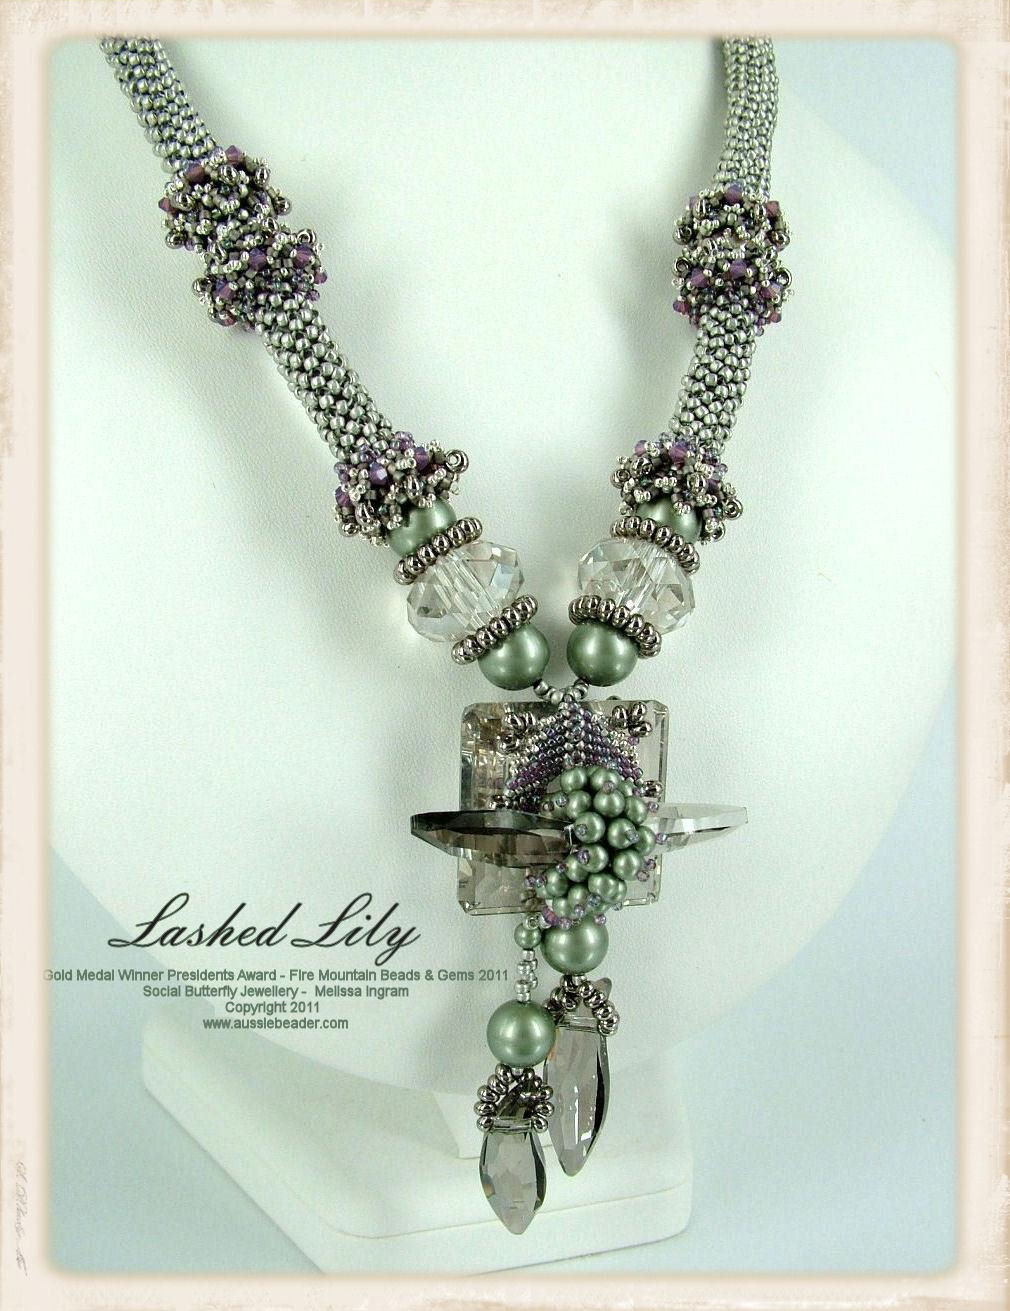
The lovely Lauren Butler who is the Gold Medal First prize winner of the 2011 Swarovski Elements Fire Mountain Beads & Gems (FMG) Contest, enlightened me earlier this week that my design 'Lashed Lily' had in fact won the Gold Medal Prize Winner - Presidents Award for the 2011 Swarovski Elements Design Contest held annually by Fire Mountain Beads & Gems.
.


It was a very nice surprise.  My Aussie beading buddy, Noel Wyres scored bronze with her design 'Bouquet' so collectively the Australian's did very well in this contest.

Comments taken from the Fire Mountain Beads & Gems website from the President of FMG "Stuart, a trained aeronautics engineer, gravitated toward the gorgeous geometrics and cleverly hidden side clasp in Melissa Ingram’s Lashed Lily necklace. Melissa used tubular peyote stitch to construct the necklace body, then assembled the cascading centerpiece with mathematical precision".
Lashed Lily is a right angle woven (unlike FMG who refer to the stitch as peyote) necklace strap (beads over armature), the magnetic clasp is hidden in the necklace strap. However the focal resembles a toggle clasp which was created using the Swarovski Square Ring Article 4439 and two Swarosvki 'Lily Focal's' Article 6904 that I simply 'lashed' together to form the toggle part of the clasp, albeit a faux toggle clasp. The design focal is embellished with Swarovski pearls and bicones. The colour way is largely green and purple with matt sterling plated Toho seed beads forming most of the beadwork.

Happy Beading
Mel